The FlexSync app makes it easy to sync Shopify metafields to Google Sheets, allowing you to manage complex product data without leaving your spreadsheet.
This documentation explains how to set up and sync custom metafields with bi-directional updates, so any changes you make in Shopify or Google Sheets will automatically update in both places.
Configuring FlexSync for Metafield Sync #
Once metafields are defined and populated, simply include them in FlexSync for sync.
Steps: #
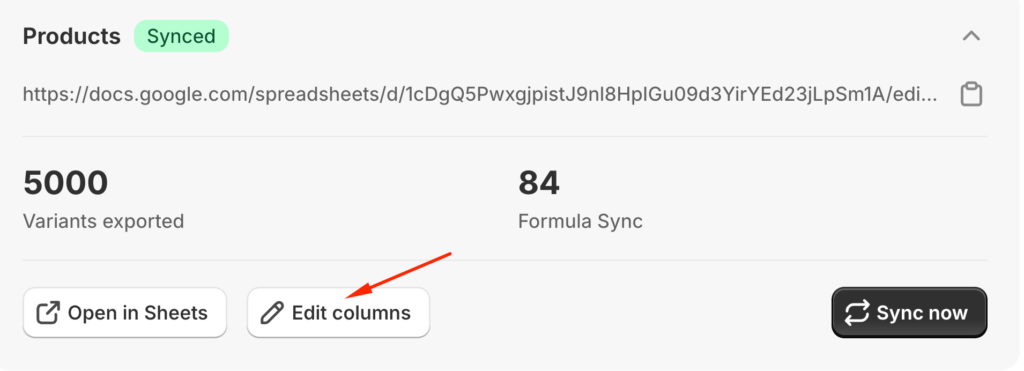
- Navigate to the FlexSync Dashboard and click Edit Columns to continue.
- Navigate to Column Settings
- Locate the list of available fields
- Identify your metafields (typically labeled with namespace.key)
- Check/select the metafields you want to sync
- Save & sync

Syncing Data to Google Sheets #
After configuration:
- FlexSync will automatically include selected metafields in the next sync cycle
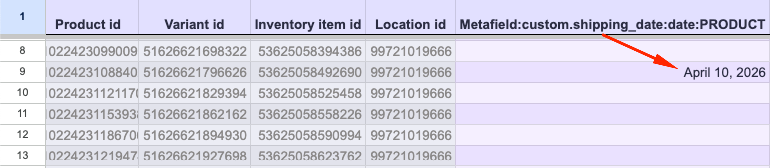
- Data will appear as columns in your connected Google Sheet
- Each metafield maps to a dedicated column
Important (Shopify Meta Fields): Meta fields are space-sensitive. Even a single extra space before, after, or within values can cause mismatches, incorrect mappings, or failed data retrieval.
Instruction: When providing values for Shopify meta fields in Google Sheets, you must strictly maintain the exact same format as defined (including casing, spacing, and structure). Any deviation from the original format may result in the integration not working correctly.
Supported Metafield Types for Sync #
When configuring metafields in your Shopify store for syncing with Google Sheets via FlexSync, the following field types are supported:
Text Types #
- Text
- Multi-line text
- Single line text
- Email (Single line text)
- URL
Numeric Types #
- Number
- Integer
- Decimal
- ID
- Money
Measurement Types #
- Measurements (support may vary depending on unit type configuration)
Date & Time Types #
- Date
- Date and time
Other Types #
- True or false (Boolean)
- Color
How to Create Metafields in Shopify #
If you need to sync data that doesn’t exist in Shopify yet, you must first define the metafield within the Shopify Admin.
To define metafields:
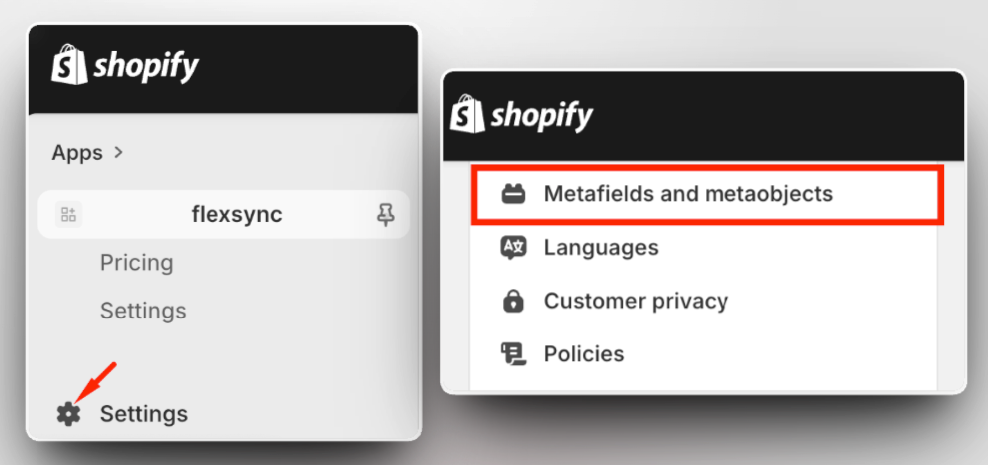
- Navigate to Shopify Admin
- Click Settings (bottom-left corner)
- Select Metafields and Metaobjects from the menubar
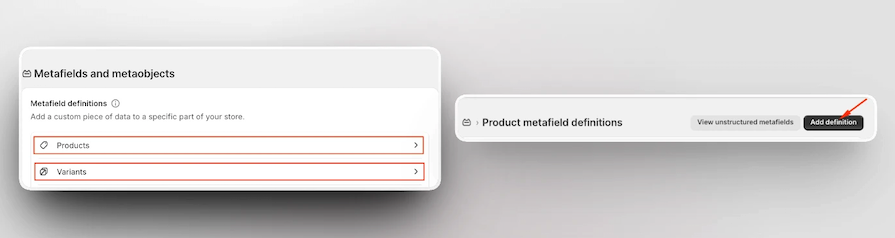
- Choose the relevant resource:
- Products → for product-level metafields
- Variants → for variant-level metafields
- Click Add Definition
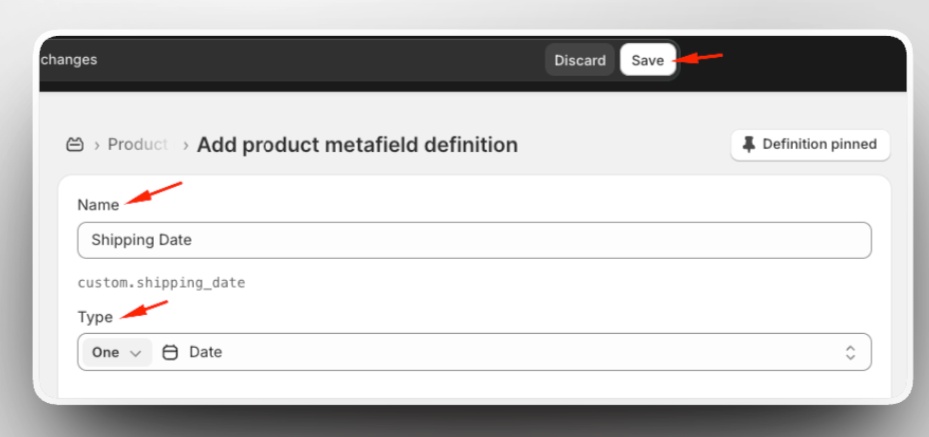
Configuration Fields #
When creating a metafield definition, provide:
- Name: Human-readable label (e.g., “Material Type”)
- Namespace and Key: Auto-generated or custom identifier
- Type: Data type (critical for compatibility)
Click Save once configured.
Adding Metafield Values to Products or Variants #
After defining metafields:
- Go to Products in Shopify Admin
- Open a specific product
- Scroll to the Metafields section
- Enter values for the newly created fields
- Save changes

Repeat for variants if applicable.
Notes #
- Some measurement-based metafields may have limited support depending on Shopify configuration.
- Always ensure metafield definitions match supported types to avoid sync issues.
- Unsupported or complex reference types may not sync correctly to Google Sheets.
Still need a hand? Schedule a live meeting and we’ll guide you through it.


