
Managing Shopify products one at a time inside the admin is fine when your catalog is small. It stops working the moment you need to update 200 prices before a sale, correct a stock figure across 50 variants after a supplier delivery, or let a team member who lives in spreadsheets update product data without giving them admin access. Shopify Google Sheets live sync solves all three of those problems at once.
This guide covers exactly how to set it up, which fields you can edit from the sheet, how to make bulk edits safely, and how to roll back changes if something goes wrong.
| TL;DR Shopify Google Sheets live sync means any edit you make in a connected spreadsheet pushes to your Shopify store automatically, and any change in Shopify reflects in the sheet. The fastest way to set it up: install FlexSync from the Shopify App Store, connect your Google account, generate a linked spreadsheet, and paste one Apps Script into Google Sheets to activate real-time sync. Once connected: edit prices, inventory, titles, SKUs, and more directly in the sheet. Changes sync to Shopify instantly or on a schedule you control.Google Sheets version history acts as a rollback mechanism if a bulk edit goes wrong. |
Table of Contents
Why Merchants Use Google Sheets to Manage Shopify Products
Shopify’s admin is built for managing individual products, not for bulk operations across a large catalog. Google Sheets fills that gap in a way that feels familiar to anyone who manages data for a living.
- Bulk editing is faster: Updating 300 prices in a spreadsheet takes minutes. The same task in Shopify admin takes hours.
- Your team already knows how to use it: Non-technical staff can update inventory or product descriptions without needing Shopify access or training.
- Formulas work: You can use Google Sheets formulas to calculate new prices, flag low-stock variants, or validate SKU formats before syncing.
- Version history is built in: Every edit is logged with a timestamp and the editor’s name. If a bulk update causes a problem, you can see exactly what changed and when.
- It’s shareable and collaborative: Multiple people can review and edit the same sheet at the same time, with comments and suggestions tracked natively.
For a deeper look at how spreadsheet-based inventory management fits into a broader Shopify workflow, see the guide to Shopify inventory management.
What Shopify Google Sheets Live Sync Actually Means
There’s an important distinction between a one-time export and a live sync. Most guides cover export tools that pull a CSV from Shopify, which you edit and then re-import. That’s not live sync. It’s a snapshot.
A live sync keeps the spreadsheet and Shopify connected at all times. There are two directions:
- Sheets to Shopify: When you edit a cell in your spreadsheet, the change pushes to your Shopify store automatically. No import. No re-upload.
- Shopify to Sheets: When a product or variant changes in Shopify (a price update, a new stock figure after a sale), the sheet reflects that change automatically.
This is what’s sometimes called a bidirectional or two-way sync. It means your spreadsheet is never stale, and Shopify is never out of step with what the sheet says.
Auto-sync makes this happen instantly. You can also switch to manual mode and trigger syncs yourself, which some merchants prefer when reviewing changes before they go live.
How to Set Up Shopify Google Sheets Live Sync with FlexSync
FlexSync is a native Shopify app that creates a live, bidirectional connection between your Shopify store and a Google Sheet. Unlike third-party automation tools that route data through external pipelines, FlexSync installs directly into Shopify, reads your store data, and links it to a spreadsheet you control. Here’s how to get it running.
Step 1. Install FlexSync from the Shopify App Store
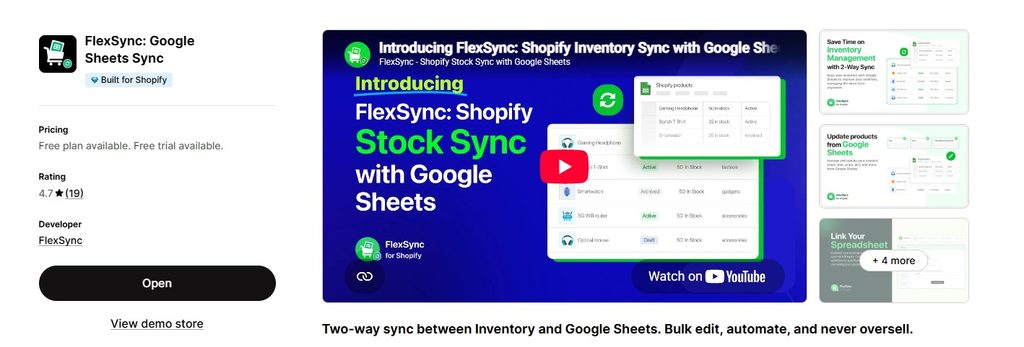
Go to the FlexSync listing on the Shopify App Store and click Install. Approve the permissions when prompted. FlexSync opens inside your Shopify admin once installation is complete.
Step 2. Connect Your Google Account
Click the button to connect your Google account. FlexSync requests access to your Google Sheets and basic profile information. This is the only authorization step. No other external accounts are needed.
Step 3. Set Up Your Spreadsheet
FlexSync gives you two options here. You can let it generate a new Google Sheet automatically, which is the faster path if you’re starting fresh. Or you can link an existing sheet by providing its URL and the tab name you want FlexSync to use.

Step 4. Select Which Data to Sync
Choose what Shopify data you want to pull into the sheet. Products and Variants are available on all plans.
Metafields (custom fields attached to products) require a paid plan. You can also apply filters here to sync only specific products, which is useful if you want to manage a single collection from a dedicated sheet. See the full guide on exporting Shopify data to Google Sheets for more on how this filtering works.
Step 5. Install the Apps Script in Google Sheets
This step is what makes the sync live rather than scheduled. FlexSync provides a short Apps Script code.
Open your Google Sheet, go to Extensions, then Apps Script, paste the code, and run it once. Grant the permissions it asks for. From this point on, the connection between your sheet and Shopify is live.
| Note: The Apps Script must be installed for bidirectional sync to work. Without it, FlexSync can export data to Sheets but cannot push edits back to Shopify in real time. |
Step 6. Start Editing
Your Shopify products now appear in the sheet, one row per variant. Editable columns appear in lavender. Columns in gray are locked and will not sync back to Shopify. Edit any lavender cell and the change pushes to Shopify, either immediately if auto-sync is on or on your next manual sync.
Save time and drive more sales with FlexSync
Install FlexSync →What You Can Edit in Google Sheets (and What You Cannot)
Not every column in the FlexSync sheet syncs back to Shopify. The columns that support bidirectional sync are shown in lavender. Columns in gray contain system identifiers and read-only data. Editing a gray column has no effect on Shopify.
Bidirectional Fields (Lavender Columns)
These fields can be edited in the sheet and will sync to Shopify:
- Title
- Price
- Compare-at Price (used to show the original price alongside a sale price)
- SKU
- Inventory quantity (per variant, per location)
- Barcode
- Metafields (on paid plans)
- & more.
Read-Only Fields (Gray Columns)
These fields display product data from Shopify but cannot be edited from the sheet:
- Product ID and Variant ID (system identifiers FlexSync uses to keep rows linked to the right product)
- Created date and Updated date
- Handle and URL path
Locking these columns protects data integrity. If row order is changed in the sheet, FlexSync still knows which row belongs to which Shopify product because it reads the ID columns, not the row position.
| One row = one variant. A product with 3 sizes and 4 colors appears as 12 separate rows in the sheet. Each row controls the inventory, price, and SKU for that specific variant combination independently. |
How to Bulk Edit Shopify Products Using Google Sheets
This is where the integration pays for itself. Instead of opening each product individually in Shopify admin, every bulk operation becomes a spreadsheet task.
Bulk Price Changes
To apply a percentage discount across a category, add a formula column to calculate the new price (for example, =B2*0.8 for a 20% reduction), copy the formula down all relevant rows, then paste the calculated values into the Price column. The changes sync to Shopify with the next auto-sync cycle. See the full walkthrough for bulk editing Shopify product prices.
Bulk Inventory Updates
After a supplier delivery, you need to update stock quantities across potentially dozens of variants. In the sheet, find the Inventory column, type the new figure for each variant, and the sync handles the rest. Fill-down works if multiple variants need the same stock figure. Copy-paste works for importing a supplier’s CSV stock count alongside your sheet.
Bulk Product Description Edits
To edit product descriptions across multiple listings at once, find the Title or description columns in the sheet, make your edits, and sync. This is significantly faster than navigating to each product page in Shopify admin. For more on this workflow, see the guide on how to bulk edit product descriptions in Shopify.
Using Formulas Before Syncing
Google Sheets formulas work on your data before it syncs. Use them to calculate rounded prices after a percentage change, flag variants with inventory below a threshold, or validate that all SKUs follow your naming convention. Once you’re happy with the results, paste as values into the editable column and trigger the sync.
How to Roll Back Shopify Edits Made in Google Sheets
Making bulk edits across hundreds of products carries risk. The wrong formula applied to the wrong column can push incorrect prices or zero-out inventory across an entire collection. Google Sheets’ version history is your safety net.
Using Google Sheets Version History
Every edit to a Google Sheet is saved automatically, along with who made the change and when. To access version history: open the sheet, click File, then Version History, then See Version History. A panel on the right shows a timeline of every change. Click any earlier version to preview what the sheet looked like at that point.
To restore a previous version: find the version you want to go back to, click the three-dot menu next to it, and select Restore This Version. The sheet reverts to that state. If auto-sync is on, FlexSync will push those reverted values back to Shopify.
Best Practice Before a Large Bulk Edit
Before making any large bulk change, name the current version. Go to File, Version History, Name Current Version, and give it a label like Pre-sale prices 7 September. If the edit goes wrong, you can find this named version instantly without scrolling through a long timeline.
| Important: Restoring a version in Google Sheets pushes the restored values to Shopify if auto-sync is active. Review the version before restoring and switch to manual sync mode first if you want to confirm the values before they go live. |
Other Ways to Connect Shopify to Google Sheets
FlexSync is not the only option. Here’s how the most common methods compare:
| Method | Cost | Two-Way | Key Limitation / Note |
| Manual CSV | Free | No | Very slow for large catalogs; no live sync |
| Zapier / Make | $19-49/mo | Partial | Event-driven, not full catalog sync |
| Google Apps Script | Free | Partial | Requires coding; breaks on API changes |
| Skyvia / Estuary | $49+/mo | One-way | Data pipeline tools, not product editors |
| FlexSync | Free/$19+ | Yes | Native Shopify app, full bidirectional sync |
CSV exports are free but slow and break the moment your catalog grows. Zapier and Make work for simple event-triggered workflows but are not designed for full catalog management. Google Apps Script gives developers control but breaks whenever Shopify’s API changes. Data pipeline tools like Skyvia and Estuary are built for analytics, not for editing products from a spreadsheet.
FlexSync is the only option on this list built specifically as a Shopify product editor that uses Google Sheets as the interface. For a comparison of the broader inventory management app landscape, see the best Shopify inventory management apps.
If you want to see what this looks like in practice, the FlexSync Google Sheets integration success story covers a real merchant’s experience moving from manual CSV exports to live sync.
Frequently Asked Questions
Does Shopify natively sync with Google Sheets?
No. Shopify has a CSV export and import feature, but it is not a live sync. You download a file, edit it offline, and re-upload it manually. There is no built-in connection between Shopify and Google Sheets that keeps them in sync automatically. That’s what apps like FlexSync are built to provide.
Is Shopify Google Sheets live sync really two-way?
Yes, when set up correctly. Edits in the sheet push to Shopify, and changes in Shopify reflect in the sheet. The bidirectional connection requires the Apps Script to be installed in your Google Sheet. Without it, data flows one way only (Shopify to Sheets).
What fields can I edit in Google Sheets and sync to Shopify?
Using FlexSync, you can edit and sync: Title, Price, Compare-at Price, SKU, Inventory quantity, Barcode, and Metafields (on paid plans). These appear as lavender-colored columns in the sheet. Gray columns are system-locked and read-only.
Can I use Google Sheets formulas before syncing?
Yes. You can use any Google Sheets formula to calculate or transform data before syncing. Calculate new prices with a formula, validate SKU formats, or flag low-stock variants. When you’re ready to push the changes to Shopify, paste the formula results as values into the relevant editable column and trigger the sync.
How do I roll back a bulk edit that went wrong?
Open Google Sheets, go to File, Version History, See Version History. Select any earlier version of the sheet and restore it. If auto-sync is active, the restored values will push back to Shopify. It’s good practice to name a version before making a large bulk edit so you can find the rollback point quickly.
Does live sync work for inventory across multiple Shopify locations?
Yes. FlexSync supports multi-location inventory on paid plans. Each variant’s stock per location appears as separate columns in the sheet, so you can update inventory at a specific warehouse or store location independently. See the guide to Shopify inventory management for more on multi-location setups.
Is there a free plan for Shopify Google Sheets live sync?
Yes. FlexSync has a free plan that covers the core sync workflow for Products and Variants. Metafields and advanced features like scheduled auto-sync and multi-location inventory require a paid plan starting at $19 per month.
Final Thoughts
Shopify Google Sheets live sync changes how catalog management works. Instead of navigating to each product in Shopify admin, your entire catalog becomes a spreadsheet that stays accurate, collaborative, and editable from any device.
The fastest path to getting it running: install FlexSync, connect your Google account, generate a linked sheet, and paste the Apps Script. You’ll be editing products from Google Sheets and watching Shopify update in real time within about ten minutes.
Start with price and inventory sync on the free plan. Once you see how bulk edits work in practice, the paid plan’s scheduled auto-sync and metafield support become easy to justify.
